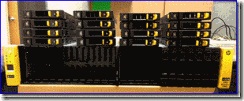
We obtained a bunch of Gen8 Blades for a client down in Florida and I figured I would create a quick “how to” guide on updating the firmware. One of the Gen8’s key features is the easier process of updating the firmware without using the traditional update CD. Before VMware or any other OS is installed on your new server I always recommend to update the firmware immediately. HP is always releasing new updates and they can truly improve the performance and reliability of your server.
Overall I like what HP has done with the firmware update process. Updating firmware is a process that is usually uneventful besides the butterfly effect in your stomach until you see the final reboot get past the initial BIOS screen (most people will relate to this). I very much like the concept of not having to use the Firmware Update CD for several reasons. Since HP constantly updates firmware you would normally have to fumble around the HP site and re-download either the updated ISO or the individual update. Now, this can be a big pain if your internet connection is provided by a T1. Once the ISO is downloaded you would now have to find a computer with a CD/DVD burner and fish around for some blank CD/DVD’s. Also, many firms have removed the built in media drive to add more storage or save costs. I have seen much time wasted on hurdles like this in the past (myself included). Most importantly, using the Smart Update manager for Firmware means that you will always be introduced to the latest updates no matter when you go to update your firmware.
Here are the steps that I used to complete the process:
1. Boot up the server. In this picture I am working with a BL460 Gen8 (half height blade server). On the newly designed Gen8 boot up screen up will see the option to hit F10 for access to the “Intelligent Provisioning (IP)” management console. Once you hit F10 the label will light up.
2. Now, the IP has begun to load up.
3. Once everything is loaded a screen will come up with two options. To move forward click on “Perform Maintenance”
4. In the next window go ahead and click “Firmware Update”.
5. The Firmware Update smart tool will now use the internet to reach out to HP and determine the available updates for your machine. You can click on the update to get more information on the fixes. Once you are ready, select the updates you wish to install. Once you hit “install” a warning windows will appear letting you know that you cannot cancel this procedure once you hit continue.
6. We have progress! You can see updates being checked off as they are remediated. Just as a heads up some updates will cause the ILO connection to be reset. HP did a good job on letting you know a few seconds before this happens.
7. Once all updates complete the HP update manager will perform a check on all components to make sure everything is healthy.
8. Once the internal health checks are completed you need to go ahead and restart the server to complete the process. The reboot doesn’t seem to take any longer than a standard one so this just seems to update the software version, etc.


